Tuesday, January 18, 2011

Butterfly kids craft with lentil trees / leaves


Materials needed:
  1. Brown paper (tree trunk)
  2. A couple of different papers for butterfly wings
  3. Decorations / circles etc for wings (optional)
  4. Scissors
  5. Glue
  6. Pipecleaners (antenna)
  7. Lentils

Cut out some tree trunk shapes using the brown paper and stick onto your background sheet.


Cut out 2 sets of wings in different colours.  Each pair of wings is a direct mirror image of each other so you need to cut out the shapes 2 at a time (2 pieces of paper on top of each other to cut an exact replica)


See the 2 sets above.  Glue these down onto the paper with slight gap between them where you will place the butterfly body.  Decorate the wings further if you wish using circles or whatever.


Cut out 2 body oblong body shapes to fill the gap you left between the wings.


See them glued onto each butterfly above.


Roll the top of each end of a pipecleaner to create some antenna.  


Glue antenna onto the top of each body.


Butterfly number 2.


If you have been using a glue stick it's time to change to regular PVA for sticking on the lentils.  Choose where you want to group them and use it liberally to make sure that lentils will stick.


I finished them off by cutting out their names to add to their work.


Nicely done kids!

Saturday, January 15, 2011

Christmas Craft Ideas: Santa, Stockings, Chrismas train Mural and Snowmen

These are what we made around Christmas but I didn't have time to put down the steps to create them.  Most are pretty easy and you will get the gist just by looking at the pics.
Enjoy :)

Santa:  A little difficult to explain but mainly just a cone shape with legs, arms and face added.


Christmas train mural:  Trees were create by tearing out triangle shape, a rectangular trunk shape and adding some decorations.  The train was drawn carriages that were painted over the top of pastels/crayons.  The paint was watered down.  Then glitter and photos were added.  Linked together by ribbon,  Precut foam flowers for the fields.  A few dodgy looking clouds and star stickers completed the picture.


The snowmen equalled 2 round circles one larger than the other.  A few bits and pieces to create faces and buttons.  Pipe cleaners or sticks for arms.  A hat and your done!


Stockings:  Cut out a couple of stocking shapes and then let them do whatever they want.  We used glitter, paper cut outs, pom poms foam etc

Lion Mask activity with add on nose and rolled mane


Step 1:  Paint the paper plate with a lion type colour


Step 2:  Print off this Tigers/Lions nose (you can download it also from (http://www.abckid.com.au/images/uploads/arts-and-crafts/Tiger_Mask.pdf) and then cover in the paint colour of your choice.


Step 3:  Cut some strips of paper to use as a mane.  We chose orange, brown and yellow.


Step 4:  Pre roll the strips of paper to make the mane curly (although you could do this once the mane was glued on)


Step 4:  Assemble the mask.  Glue the curled paper strips around the edge of the painted plate.  Glue on the nose that was painted and cut out (fold over the tabs and glue them down somewhere in the middle of the plate).  Use a few pipe cleaners to make a mouth and whiskers.  Cut out some eyes and stick on a icypole stick (or similar) to the back of the plate (we joined 3 together).

And here are my 2 and a half year old boys with their completed masks.  Now they can really roar like a lion.....their favourite pass time!

Indian Elephant Craft

For this gorgeous little elephant you firstly need to grab a copy of the template from the link below.  This we sketched onto a larger piece of paper (we used A3) and then my daughter painted it and cut it out and glued on the ear which has a separate template on the same page.


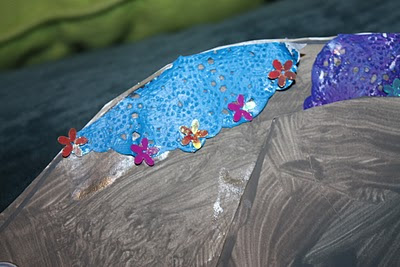
A doily painted another colour and a few scatters glued on made a great rug for the back of the elephant.


More of the doily (a small section was cut out of the original piece) was painted another colour and decorated again with some scatters.


Some sticky dots stuck on each of the feet made great toenails.  We used silver which looked good.  Add a googly eye or similar.


And last but not least some wool finished it off creating a tail. A bit of fun.